May 24, 2025

Here's a step-by-step guide for POC in Oracle Cloud SCM, focusing on creating a new item, creating a sales order, and shipping it.

Phase 1: Setup and Item Creation

  1. Verify Initial Setup (Pre-requisites):

    • Access: Ensure you have the necessary roles and access to Oracle Cloud SCM (e.g., Inventory Manager, Order Manager, Product Data).

    • Business Unit (BU): Confirm you have a Business Unit defined and associated with your inventory organization.

    • Inventory Organization: Ensure your target warehouse is set up as an Inventory Organization in Cloud SCM. You mentioned leveraging an existing one, so just confirm its existence and setup.

    • Item Master Organization: Identify your Item Master Organization. This is where you create the item definition centrally.

    • UOMs (Units of Measure): Basic UOMs (e.g., EA for Each, LB for Pound) should be set up.

    • Item Catalogs/Categories: While not strictly mandatory for a basic POC, it's good practice to have some item catalogs and categories defined.

  2. Create New Item:

    • Navigation: Go to Product Management -> Product Information Management.

    • Create Item:

      • Click on "Tasks" panel (usually on the right or left) and select Create Item.

      • Organization: Select your Item Master Organization.

      • Item Class: Choose an appropriate Item Class (e.g., Purchased Item, Finished Good). This drives default attributes and lifecycle.

      • Template (Optional but Recommended): If you have a template for similar items, use it to pre-populate attributes.

      • Item Number: Enter a unique item number.

      • Description: Provide a meaningful description.

      • Lifecycle Phase: Set to New or Active.

      • Status: Set to Active.

      • Primary Unit of Measure: Select the base UOM (e.g., EA for Each).

      • Save: Save the item.

    • Associate to Inventory Organization:

      • After saving, go to the Associations tab for the item.

      • Click the + icon to add an association.

      • Select your Inventory Organization (the warehouse where you want to transact this item).

      • Enable for Inventory: Ensure the Inventory Asset Value (or similar) attribute is checked at the organization level if you want it to be an inventory item.

      • Order Management Enabled: Crucially, for Order Management, navigate to the Sales and Order Management tab for the item (at the org level) and ensure Customer Ordered, Customer Orders Enabled, Internal Ordered, and Internal Orders Enabled are set to Yes.

      • Pricing Enabled: On the Sales and Order Management tab, ensure Priced is set to Yes.

      • Save: Save the association.

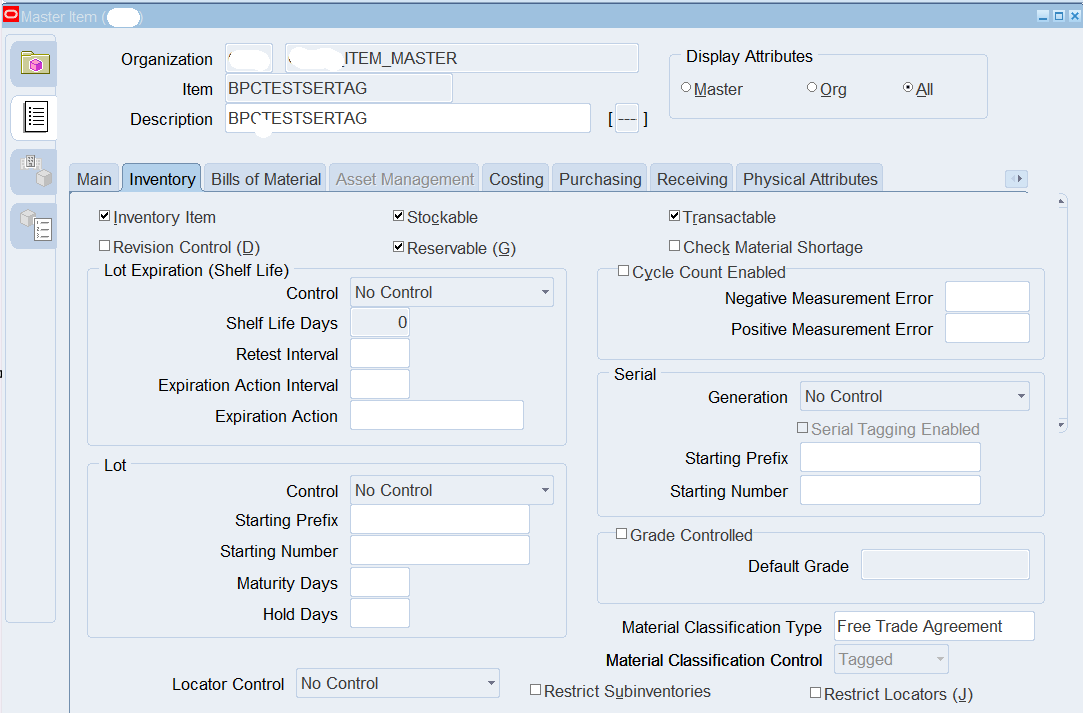
    • Define Inventory Attributes:

      • Go to the Specifications tab -> Inventory section.

      • Review and adjust attributes like Min/Max Quantity, Lot/Serial Control (if applicable), Picking UOM, Storage UOM. For a POC, defaults might suffice.

    • Define Sales & Order Management Attributes:

      • Go to the Specifications tab -> Sales and Order Management section.

      • Confirm the Shippable, Customer Orders Enabled, Customer Ordered attributes are set to Yes.

      • Ensure a Default Sales UOM is set.

    • Costing (Optional for basic POC):

      • Go to the Costs tab. You can manually enter a standard cost or wait for costing processes to run. For a basic order, it's not strictly necessary to have a full cost rollup, but it's good practice.


Phase 2: On-Hand Quantity & Pricing

  1. Load On-Hand Quantity (Simulate Receipt):

    • Method: Miscellaneous Receipt:

      • Navigation: Supply Chain Execution -> Inventory Management.

      • Tasks: Create Miscellaneous Transaction.

      • Transaction Type: Miscellaneous Receipt.

      • Item: Select your new item.

      • Quantity: Enter the desired on-hand quantity.

      • Subinventory: Select a valid subinventory.

      • Locator (if applicable): Select a locator.

      • Reason Code: Select a reason.

      • Submit.

    • Verification: Confirm on-hand quantity by searching for the item in Manage Item Quantities.

  2. Set Up Item Price:

    • Navigation: Order Management -> Pricing Administration.

    • Price List: Identify an existing Price List or create a new one for your POC.

      • Go to Manage Price Lists.

      • Select or create a Price List (e.g., "Corporate Price List").

    • Add Item to Price List:

      • Edit the chosen Price List.

      • In the Items tab, click + to add a new price list line.

      • Item: Select your new item.

      • UOM: Select the selling UOM.

      • Price: Enter the selling price for your item.

      • Start Date/End Date (Optional): Set effective dates if needed.

      • Save and Publish: Save your changes and ensure the Price List is Published.

Phase 3: Order to Ship Process

  1. Create Sales Order:

    • Navigation: Order Management -> Order Management .

    • Create Order: Click on Create Order.

    • Header Information:

      • Customer: Select your existing customer.

      • Sold-to Business Unit: Select the appropriate BU.

      • Bill-to Account/Ship-to Account: These will likely auto-populate based on the customer.

      • Requested Ship Date: Enter a date.

      • Price List: Ensure the correct Price List (with your item's price) is selected.

    • Line Information:

      • Go to the Lines tab.

      • Click + to add a line.

      • Product: Search for and select your new item.

      • Quantity: Enter the desired order quantity.

      • UOM: Select the selling UOM.

      • The price should auto-populate from your price list.

      • Shipping Details: Ensure the Ship-from Warehouse (your inventory organization) is correctly defaulted or selected on the line.

    • Save and Submit:

      • Click Save to save the draft order.

      • Click Submit to send the order through the order orchestration process.

    • Monitor Order Status: Observe the Fulfillment Lines status. It should progress from Awaiting Scheduling to Scheduled, then to Awaiting Shipping.

  1. Pick Release (Generate Pick Slips):

    • Navigation: Supply Chain Execution -> Inventory Management.

    • Tasks: Manage Shipments or Pick Waves.

    • Create Pick Wave:

      • You can create a new pick wave.

      • Select Release Sales Orders.

      • Enter criteria to find your order (e.g., Order Number, Warehouse, Customer).

      • Specify Release Rules (e.g., Auto Confirm Picks for simplicity in POC).

      • Click Release.

      • Alternatively, the order might be released automatically if you have auto-release rules configured.

  • Confirm Pick Slip:

    • After pick release, the order line status should move to Awaiting Shipping.

    • If Auto Confirm Picks wasn't used, you'd typically confirm picks in Confirm Pick Slips or Review Completed Picks. For a POC, if you can skip physical picking and confirm directly, that's quicker.

  1. Ship Confirm:

    • Navigation: Supply Chain Execution -> Inventory Management.

    • Tasks: Manage Shipments.

    • Find Shipment: Search for your shipment using the Order Number or Shipment Number (which is generated after pick release).

    • Edit Shipment: Open the shipment.

    • Lines Tab: Review the items and quantities.

    • Ship Confirm: Click on Ship Confirm.

      • This action will typically update inventory, generate packing slips, and trigger invoicing interfaces.

      • Ensure Actual Ship Date and Shipment Method are populated.

    • Verification:

      • Check the order status in Order Management; it should now be Shipped and the Interfaced.

      • Verify the on-hand quantity for your item in Inventory Management has decreased.


Read More

May 15, 2025

In Oracle Fusion Cloud, an enterprise is structured using a hierarchical model to represent its legal, managerial, and functional aspects. Here's a breakdown of the key components:  

1. Enterprise:

  • This is the highest level in the hierarchy and represents the entire organization.   
  • A single Oracle Fusion Cloud instance typically has one enterprise.
  • It acts as a container for all legal entities, business units, and other organizational structures.   
  • Functionally, the enterprise itself has limited transactional capabilities. Its primary purpose is to provide an overarching structure.

2. Legal Entities:

  • These represent the legally registered entities of the organization.   
  • Each legal entity is recognized by law and has rights and responsibilities (e.g., owning property, entering into contracts, paying taxes).   
  • You define a legal entity for each company or entity for which you need to record assets, liabilities, equity, revenue, and expenses.   
  • Legal entities are crucial for statutory reporting and compliance.
  • In Oracle Fusion Cloud HCM, legal entities that employ people are also designated as legal employers.   
  • A legal entity can be associated with one or more balancing segment values in the Chart of Accounts to ensure a balanced trial balance at the legal entity level.   

3. Business Units:

  • These are subsets of an enterprise that perform one or more business functions.   
  • A business unit can process transactions on behalf of one or many legal entities.   
  • They typically have a manager, strategic objectives, a level of autonomy, and responsibility for their profit and loss.   
  • Business units are used for management reporting, transaction processing, and data security.   
  • They are associated with a primary ledger for financial transactions.   
  • Business units can share reference data (e.g., payment terms, transaction types) or have their own sets based on business needs.   
  • Examples of business functions performed by business units include sales, marketing, manufacturing, and customer service.   

4. Divisions (Optional):

  • Divisions are used to group business units that share common characteristics or strategic objectives within a legal entity.
  • They provide an additional layer for management reporting and analysis.
  • The use of divisions is optional and depends on the complexity and managerial structure of the enterprise.   

5. Departments (Optional):

  • Departments represent functional areas within a business unit.   
  • They are used to organize employees based on their roles and responsibilities.
  • Departments are primarily used in Human Capital Management (HCM) for workforce management and reporting.   

In summary, the enterprise structure in Oracle Fusion Cloud provides a framework to model your organization's legal obligations, management responsibilities, and operational units. It starts with the overarching Enterprise, which contains Legal Entities (the "who" from a legal perspective), and Business Units (the "what" and "how" in terms of business functions), with optional Divisions and Departments for further managerial and functional segmentation.


Lets take a hypothetical example


1. Enterprise:

  • Global Innovations Inc. is our top-level enterprise in Oracle Fusion Cloud. This single instance will house all their operations.

2. Legal Entities:

  • Since Global Innovations Inc. operates in both the United States and Canada, they would likely have two legal entities:
    • Global Innovations Inc. (US): This legal entity is registered in the United States and is responsible for their US operations, including the facility in Waukesha. It will handle US taxes and legal compliance.
    • Global Innovations Inc. (Canada): This legal entity is registered in Canada and manages their Canadian operations, adhering to Canadian laws and regulations.

3. Business Units:

  • Now, let's consider the different business functions within Global Innovations Inc. They might have the following business units:
    • US Sales Business Unit: This unit is responsible for all sales activities within the United States. It processes sales orders, manages customer relationships, and generates US-specific sales reports. This business unit would likely process transactions on behalf of the "Global Innovations Inc. (US)" legal entity.
    • Canadian Sales Business Unit: This unit handles sales operations in Canada, dealing with Canadian customers and adhering to Canadian sales practices. It would process transactions for the "Global Innovations Inc. (Canada)" legal entity.
    • Manufacturing Business Unit: This unit is responsible for the production of Global Innovations Inc.'s products. Let's say their main manufacturing plant is in Waukesha. This business unit might process transactions for the "Global Innovations Inc. (US)" legal entity related to production costs, inventory, etc.
    • Global Services Business Unit: This unit provides after-sales services and support to customers in both the US and Canada. It might process transactions on behalf of both legal entities depending on the customer's location.

4. Divisions (Optional):

  • Suppose Global Innovations Inc. wants to segment their business based on product lines. They could create divisions like:
    • Electronics Division: This division could encompass the US Sales Business Unit and the Canadian Sales Business Unit if they both sell electronic products.
    • Software Division: If they also develop and sell software, they might have a separate division overseeing the sales of those products in both regions.
    • The Manufacturing Business Unit might report directly to the Enterprise level or potentially under an "Operations Division" if they had other manufacturing plants.

5. Departments (Optional):

  • Within the US Sales Business Unit (located in Waukesha), they would have departments like:
    • Sales Management
    • Inside Sales
    • Field Sales
    • Sales Operations
  • Similarly, the Manufacturing Business Unit would have departments like:
    • Production Planning
    • Assembly
    • Quality Control
    • Logistics

How it all fits together:

  • Global Innovations Inc. (Enterprise) is the overarching container.
  • Underneath, we have Global Innovations Inc. (US) and Global Innovations Inc. (Canada) as the legally recognized entities.
  • The US Sales Business Unit and Manufacturing Business Unit primarily operate under the Global Innovations Inc. (US) legal entity.
  • The Canadian Sales Business Unit operates under the Global Innovations Inc. (Canada) legal entity.
  • The Global Services Business Unit might interact with both legal entities.
  • Optionally, the Electronics Division and Software Division help in managerial reporting across the sales business units.
  • Within the US Sales Business Unit (potentially in the Waukesha office), you'd find specific departments like Sales Management and Inside Sales.

This example shows how Oracle Fusion Cloud's structure allows Global Innovations Inc. to manage its legal obligations separately for the US and Canada, while also organizing its business functions (like Sales and Manufacturing) into business units for operational efficiency and reporting. The optional divisions provide another layer for strategic analysis, and departments help manage the workforce within each business unit.

Read More

April 22, 2025


Setting Up a Coupon Issue Modifier in Oracle Advanced Pricing

Oracle Advanced Pricing offers a flexible way to configure Coupon Issue Modifiers, allowing businesses to provide customers with redeemable coupons for future price adjustments or benefits. This setup ensures that promotional discounts are tracked and applied strategically.

Understanding Coupon Issue Modifier Setup

To create a Coupon Issue Modifier, you must set up two modifier lines within the same Modifier List:

  1. Coupon Benefit Modifier – Defines the price adjustment or benefit (e.g., a 10% discount).

  2. Coupon Issue Modifier – Defines the coupon details (e.g., name, expiration date, and conditions for redemption).

By linking these modifiers, Oracle ensures that coupons are issued only when the defined benefit applies.

Step-by-Step Setup Guide

Step 1: Create a Modifier List

  1. Navigate to Oracle Advanced Pricing > Modifiers > Define Modifier.

  2. Create a new Modifier List and define the header details:

    • Set Modifier Type to Promotion (this will act as the parent modifier).

    • Enter a Name (e.g., "Spring Sale Promotion").

    • Define the Effective Dates to control coupon availability.

Step 2: Set Up the Coupon Benefit Modifier

  1. In the same Modifier List, create a new modifier line:

    • Modifier Type: Select Discount.

    • Benefit Definition: Set the discount as Percentage (%) or Amount ($).

    • Conditions: Define qualifiers like minimum order value or eligible items.

    • Automatic Flag: Enable to ensure the benefit applies automatically when conditions are met.

    • Save the record.

Step 3: Set Up the Coupon Issue Modifier

  1. Add another modifier line to the same Modifier List:

    • Modifier Type: Select Coupon Issue.

    • Coupon Name: Define a recognizable coupon name (e.g., "Spring Sale $20 Coupon").

    • Expiration Date: Set the validity period for coupon redemption.

    • Coupon Modifier Number: Enter the Modifier Number of the Discount Modifier created in Step 2 (this links the coupon issuance to the applied discount).

    • Save the record.

Step 4: Validate Setup

  1. Test with a Sales Order:

    • Create an order that qualifies for the Coupon Benefit Modifier (e.g., meets the minimum value for discount).

    • Ensure that the Coupon Issue Modifier applies correctly, issuing the coupon.

    • Review the Pricing History to verify modifier application.

  2. Check Coupon Redemption:

    • Ensure the coupon can be used in a future order within the expiration period.

Key Considerations

  • Both Coupon Benefit and Coupon Issue Modifiers must belong to the same Modifier List to function correctly.

  • Proper Qualifier Setup ensures coupons are issued only for eligible transactions.

  • The Coupon Modifier Number field in the Coupon Issue Modifier must correctly reference the Discount Modifier to link the benefit.

Test Modifier Setup 
Test Order line where Coupon got issued
Added another line and applied the previously issued coupon which applied a discount


Read More

In Oracle Order Management, pricing involves several key components that work together to define and apply pricing to orders. Here's an overview of the basic components:

1. Price Lists

  • Price lists are the foundation of pricing in Oracle EBS. They define the base price for items and may include additional details such as currency, unit of measure (UOM), and effective dates. Key Attributes:

    • Item Price

    • Currency

    • Effective Period

2. Modifiers

  • Modifiers are used to define additional pricing adjustments like discounts, surcharges, promotions, and freight charges. They help tailor pricing to specific business scenarios. Types:

    • Discounts (e.g., percentage, amount)

    • Surcharges

    • Promotions (e.g., buy one, get one free)

3. Qualifiers

  • Qualifiers are conditions that determine when a price list or modifier should be applied. They enable flexibility by linking pricing to specific customers, regions, or order attributes. Examples:

    • Customer Groups

    • Item Categories

    • Sales Channels

4. Pricing Attributes

  • Pricing attributes are additional fields or characteristics (e.g., ship method, order type) that refine how pricing is applied. They help define complex pricing scenarios such as formula-based pricing.

5. Secondary Price Lists

  • Secondary price lists act as a fallback mechanism when items are not priced on the primary price list.

6. Pricing Formulas

  • These allow for dynamic pricing by calculating prices based on formulas. For example, a formula might include factors like item cost, quantity, and region-specific adjustments.

7. Freight and Special Charges

  • Pricing can include freight costs or special charges, calculated as part of the overall price based on shipping method, carrier, or other factors.

8. Customer Profiles and Agreements

  • Customer-specific pricing agreements can be set up to define negotiated prices or discounts for specific customers or groups.

9. Adjustments and Overrides

  • Users can apply manual price adjustments or overrides during the order process, provided they have the appropriate authorization.

Read More

April 18, 2025

The Material Classification Code (MCC) feature in Oracle EBS Item Master Setup is essential for organizing and managing inventory effectively. This feature was added in 12.2.6 and later enhanced in 12.2.10. Businesses leverage this feature for several key use cases:

1. Inventory Organization & Segmentation

  • Helps categorize items based on their nature, such as raw materials, finished goods, consumables, or hazardous materials.

  • Facilitates better searchability, reporting, and grouping of items in inventory.

2. Compliance & Regulatory Tracking

  • Essential for industries like pharmaceuticals, chemicals, and aerospace, where strict regulations govern material handling.

  • Allows companies to classify materials based on safety regulations, hazardous handling requirements, or environmental constraints.

3. Pricing & Cost Control

  • Enables businesses to assign unique classification codes that can be used to apply specific pricing models, taxes, or cost tracking.

  • Helps in budget planning and cost analysis, ensuring proper cost allocation based on material type.

4. Supplier & Procurement Optimization

  • Helps in supplier-specific classifications, allowing procurement teams to streamline ordering processes.

  • Assists in bulk purchasing decisions, determining reorder points for different material categories.

5. Forecasting & Demand Planning

  • Supports predictive analytics, helping businesses anticipate material consumption trends.

  • Enables optimized stocking levels, reducing the risk of shortages or overstock situations.

6. Production & Manufacturing Efficiency

  • Improves BOM (Bill of Materials) management, ensuring accurate material selection during manufacturing.

  • Helps in work order planning, ensuring the right materials are available at the right time for production.


Setup

1. Setup the Classification Type
Inventory Setup --> Lookup


2. Setup Classification Code
Inventory Setup --> Transactions --> Material Classification Code

3. Assign to Item
Item Master --> Material Classification Type

4. Tag to Transaction Types
Actions--> Material Classification Tagging Assignments


Post this at all transaction level MCC will be maintained and traced.


Read More
Copyright © . Oracle Apps (SCM) . All Rights Reserved
Oracle Apps (SCM) is an online knowledge sharing blog which index online free tutorials, blogs and other sources, to get easier and accessible manner. The blog has been created keeping only one intention of sharing knowledge and for learning purpose. All trademarks, trade names, service marks, copyrighted work, logos referenced herein belong to their respective owners/companies. If any of the posting is violating copyright and you want us to remove that content. Please contact Here